
How Sorting Your Craft Supplies Creates Less Clutter
This how to sort & declutter a craft room story was told by Lydia Fiedler, blogger for Understand Blue, and was featured in our Fall 2015 catalog.
To get a copy of our catalog, click HERE!
My name is Lydia and I have full-set syndrome. You know what I mean. If a craft supply comes in 8 colors, I have to have all 8. If it comes in 80 colors, I need all 80.
I have been paper crafting for over 30 years. Needless to say, my collection of craft supplies has grown. However, my space, much to my chagrin, has not expanded to fit the contents.
For 12 years, I survived in a craft room (10 feet by 11 feet) which was bursting at the seams! Every time I bought a new storage “thing” to put some crafting items in, the room got more crowded and became less functional. I actually got to the point where walking in there to craft and excavating around the space for my supplies felt like work.
One day I awoke to a new realization. It truly was like a lightning bolt struck me! I didn’t need more space. I needed a LOT less stuff. The real epiphany was this; I didn’t need all the stuff I couldn’t get to. I started the de-stashing journey with a vengeance and learned so much in the process.
First, it was critical that I cleared the room. The way I cleared the room changed everything for me. I’d encourage you to try what I did. I pulled everything out and put it in a big pile in another room. Since this de-stashing process took place during the holidays (what was I thinking?), I draped tablecloths over the pile, put a star on top, and called it our “Christmas tree”. You might think I’m kidding. I’m not.
For almost a month, I temporarily set up folding tables in the now empty room so that I could still use it for my computer and stamp area. After a while, I was able to see how much space I really had and how to eventually orient my work and computer surfaces. I started putting masking tape on the floor to mark out where potential furniture could go and I cannot tell you how important this was to the final result. Live in your empty space before you buy furniture. This will lead to a much more functional design, especially as you choose storage units and furniture. Fitting functional items into a space makes sense instead of trying to work around existing furniture. Let go of any attachments to current furniture, such as storage pieces, and let the empty room layout speak to you.
Next, I did what I call “strict sorting” of the “Christmas tree”. Without regard to keep or pitch, I sorted every item by type. All stamps together, all inks together, all rhinestones together. This step was key and I really want everyone to understand how important this is. It will require many boxes and it will be time consuming. However, when you’re done you will be able to see exactly how many duplicates you had of things you once bought but couldn’t find. For example, I discovered that I must have 25% of the world’s share of binder clips. I had no idea that this was the case until strict sorting. Nothing was allowed back into my room until this step was complete. The boxes of strictly sorted items dictated how much space each item would need in my new setup.
Only at this point did I decide what needed to be kept, sold, or thrown away (which was a lot of stuff!). One tip here, as daunting as this project is, I documented the entire procedure in an album on my Facebook page and I can’t tell you how much easier it made the process. It really will keep you from feeling overwhelmed if you share this with your crafty friends. I even inspired a few of my friends to start their own reorganization after seeing me come out alive from mine with an adorable and functional result.
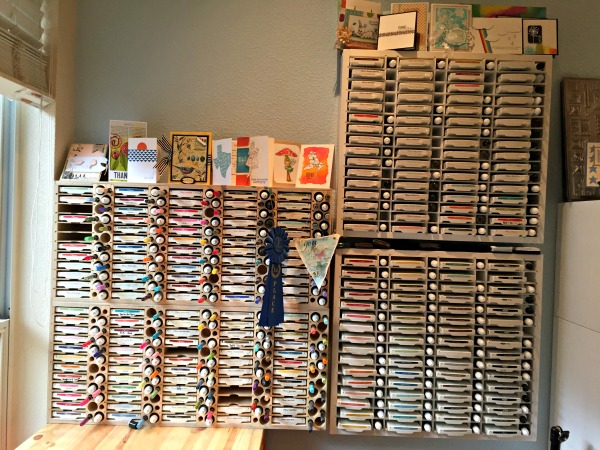
Furthermore, once I made this final separation between keep versus sell, the keep pile dictated my storage needs. I knew exactly how many paper storage units I would need by looking at one clean pile of cardstock and how much ink pad storage I needed by looking at my “keep” ink pad pile. It really helped shape how I would design my new space. I also knew that I wanted to see my ink and cardstock. One of the greatest joys of my new craft room is the paper storage displaying my cardstock in rainbow order. Seeing that makes me happy every time!
Another important part of the process is the sell phase. I completely let go of something that had been very hard for me during sales before; the guilt I felt for spending full price on something I wasn’t using anymore. I used to endlessly worry about this and priced my items at half off, or even at a higher price. Trust me; it’s not an effective way to de-stash. This time I had a different attitude; one of charity. I set up sale tables, had my sister do a check in and out process at the door, gave every shopper a bag and a glass of champagne, and I let nearly everything I was selling go for about $1. My friends and customers got some great deals (or should I say, steals!) and this brought them joy, which brought me joy! I ended up with $1700 from this $1 sale (I guess this tells you how much stuff I needed to sell!) and that paid for my new furniture, paper storage units, punch shelves, and some custom cat lounging stations which were an essential part of the remodel. Afterwards, I had $700 left over and I put that away in my stamping account for fun purchases.
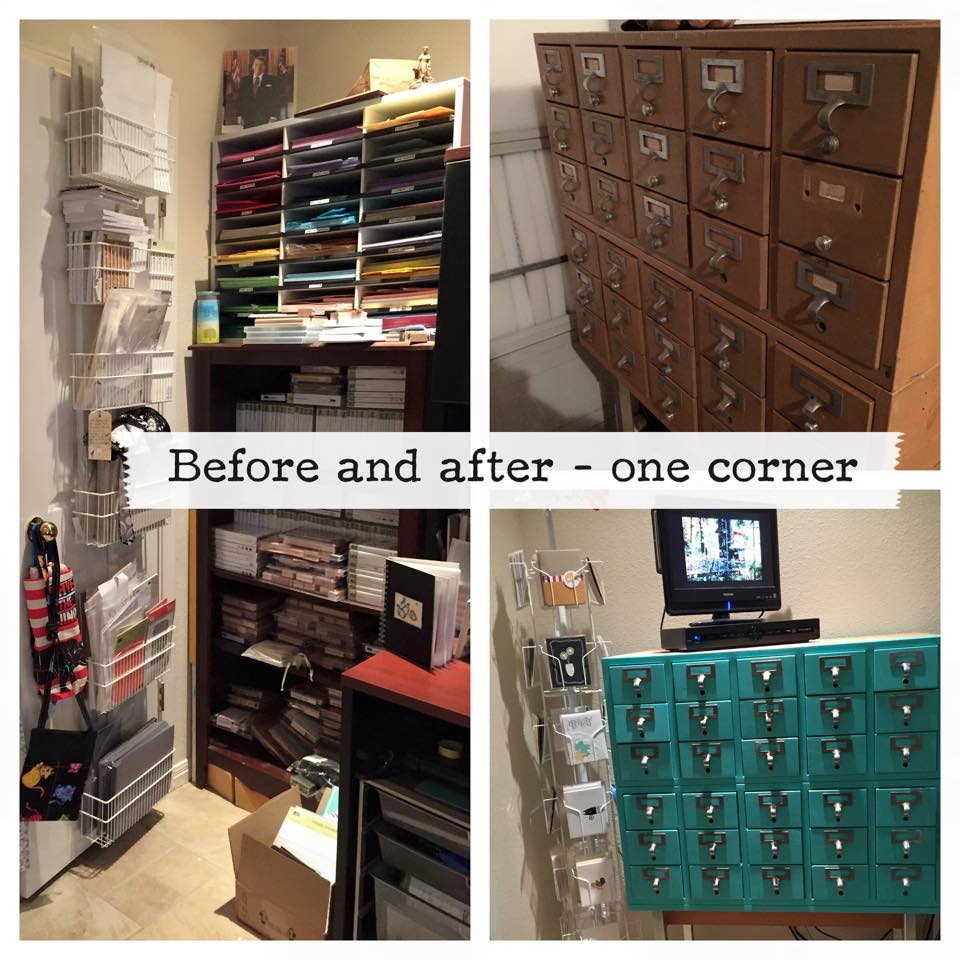
Next, I started deciding on storage units and furniture. I quickly recognized that smaller compartments are better. I purchased and refinished a card catalog which has 30 long, thin drawers. Many of the items crafters have are small. Something to remember is that in order to keep similar things together, we need many small spaces and few large containers. Large storage items, such as crates and bins, tend to gather haphazard collections of things and this leads to crafty chaos! In my old craft room setup it seemed that I was only ever looking in the top storage bins. I would search for a craft supply, such as sequins, knowing I had it, but would decide just to go buy more sequins at Michael’s® because it was easier. Well, eventually I would end up with what seemed like 4,000 packages of sequins I could never get to! This is why having many small drawers that are easily accessible makes an incredible difference.
In addition to the card catalog, I have another large multi-drawer unit that came to me by way of a miracle. Since I had taped off the floor and knew how much space I was going to have behind my desk for storage, I was carrying that measurement around with me everywhere to look for just the right piece. One day, my brother-in-law showed me a picture of the most beautiful turquoise drawer I had ever laid eyes on. Not only was it a perfect match for my card catalog, but it also had 28 deep drawers! Come to find out, the dimensions were exactly the right size for my space. That’s the kind of serendipity that happens if you have the patience to sit in an empty space for a while.
If you stick to strict sorting and have small, numerous compartments, you are more likely to stay organized over the long haul. Now, I find that when I’m done with a project, my room is neat again within minutes because everything has a place. If you would have told me last summer that I’d have an organized craft room where everything is sorted, labeled, and easy to get to, I would have laughed. I truly can’t believe that walking into my craft room used to give me a sense of dread because now it is pure bliss.
I only buy supplies based on whether or not they will have a logical place in my storage system. If they don’t, I don’t buy them. It’s amazing how being organized can change every aspect of the creative process. I now film tutorial videos nearly every week. My desk is always clean and my camera mount is in place on my desk. This has been one of the most fun and rewarding effects of the remodel.
My advice to anyone embarking on this journey is to allocate several months, not a weekend. A weekend plan will leave you frustrated and the project will only be half done. Don’t give up. Get your family to buy into the timeline as well (which in our case was critical for us to survive the “Christmas tree”). Remember to only keep the things that spark joy. Sell or donate the rest so that they can spark joy in someone else. Document your process in a Facebook album or with real photos. The “after” photos are incredibly gratifying, and the support from online friends will see you through the piles with a smile.
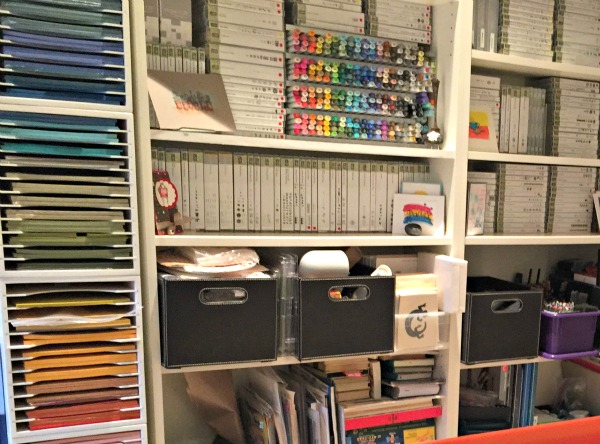
These craft supplies look so organized!
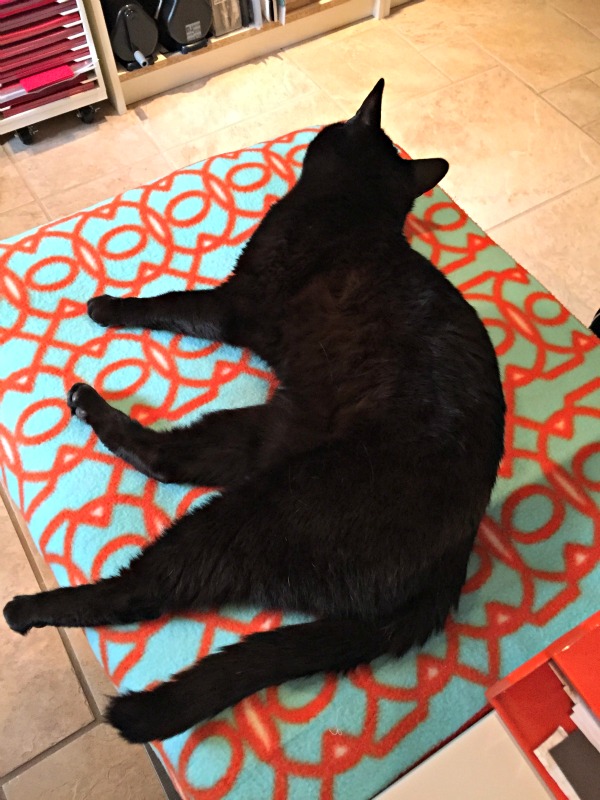
Lydia's cat!
Her tower of paper is a rainbow of craft inspiration!